The idea of refinishing our table with bottle caps was always an idea, but one we decided to wait to possibly complete when we moved to a house we would be in awhile.
SO yesterday, as we completed our stepping stone art project, I pulled out the collection of bottle caps to find a Guinness cap for Guinness' stepping stone. (the kit for which we have moved 5 times in the last 5 years)
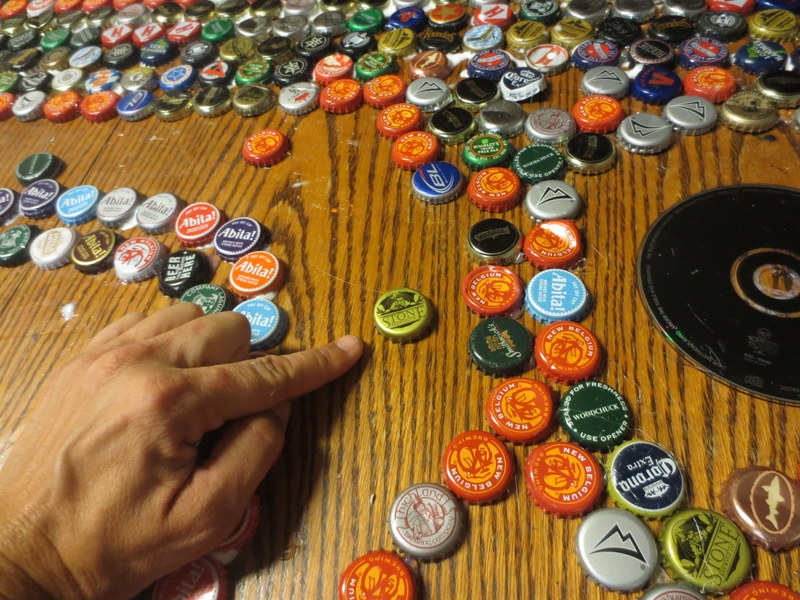
I decided to "Carpe Diem" and finally start on the bottle cap art for our table. Which included at least an hour of sorting out the caps we had. I didn't count, but we definitely have a majority of New Belgium caps. My theory in this is that the various New Belgium brews were our solution to good available beers on a regular basis in the stores. Abita in Georgia was not always fresh, so we quit buying it up there. Highland Ales were our #1 cap when in North Carolina (not sure what happened to that collection of caps.. not all of them made the cut in the move to Georgia evidentally), but again, Highland beer was not even a faithfully fresh beer when purchasing where it could be found in Georgia.
So, New Belgium caps were followed in quantity by Sweetwater caps. (I think that Abita will surely win out in the next bottle cap creation as we can actually get fresh Abita bottled beer now!)
The next step, which took at least 2 hours, was to lay them out on our table to see 1. if we had enough caps to cover the table AND 2. what type of pattern we were going to create. (I will go into detail about the different rows/patterns and how they were chosen in the pictures of the assembly.)
Through input from husband, we decided to move the table into the garage to complete the project. (Inhalation warnings on the epoxy did the trick.) So I took the leaf out of the table (what CAN you do with those pieces of wood? This table had two of em!) and we moved the table into the garage.
And so began, Wednesday night at about 7 PM, the gluing of the caps.
I had purchased three containers of Gorilla Super Glue, with the hopes that would be enough.
After not even half of the first row of caps, I was almost out of Super Glue.
Time for another plan.
I decided that plain ol Elmer's glue would have to do the trick.
We had one bottle in our "art box", and Camryn had a 3/4 full bottle of Modge Podge.
When those were gone, I searched the whole house and found a pink sparkly bottle of Elmer's.
And yes, that was totally used as well and I had to resort to hot glue.
More than once in this project, I realized you must OVERESTIMATE the supplies you need!
Here are the pictures from Wednesday, June 26th... Day 1 of project:
 |
| The naked table, ready for action. This table was purchase in May 2000. The top was basically stripped off due to my lack of knowledge at the time of the damage cleaners can do to wood tabletops. It was used for hundreds of art projects, and therefore went through many cleanings. |
 |
| Lauryn working on row 1. We used New Belgium for row 1. The white New Belgium caps were from their winter brews. We were a big fan of "2 Below" and "Snowed In". You will see in the finished product just how many red bottle caps we had! |
 |
| Rows 2 and 3. Row 2 was Sweetwater and Highland. Row 3 was mostly Sierra Nevada with some Lagunitas. We did 4 or 5 Sierra Nevade/Lagunitas with a Victory cap, Harpoon cap, and then "Beer From Around Here" which is Red Brick Brewing in ATL. |
 |
| Row 4 was a bunch of miscellaneous brews that I categorized as ones we really liked,. To name a few, there are Rogue, Stone, Oberon, Bell's, Terrapin.. and lots more. |
 |
| Almost done gluing. Well, the whole right side has a good many left that are loose. I added some CDs of top tunes in the Blanchard memory bank. |
 |
| This was probably 2 glasses of wine and 3 hours deep of gluing. |
 |
| Camryn graced me with her presence toward the end of the project again. She helped glue down some loose ends. |

 |
| The LAST cap that I glued down around 10:30 PM. |
I took my time this morning with prepping the area for epoxy resin coating.
It also took almost three cups of coffee to wake me up. (I am a one cup of coffee person.)
I followed the recommendations fully with Painter's tape, duct tape, and foil.
 |
| Ready to pour!!! |
Low and behold, 64 oz. of this stuff was not enough.. should have known. When I approximated the size, I wasn't thinking that the box is talking about a FLAT surface coating. Oh well.. live and learn.. off to Lowe's I go for more epoxy resin.
6/27/13 1:27 PM: I just finished the full first coat.
 |
| It seems that the resin is right up to the top of most of the bottle caps. I am thinking one more full coat in 4 hours will be enough to cover all. |
 |
| Here is part of my mess. |
Here are a few things I would definitely do differently:
- WEAR GLOVES! I am such a dufus on a regular basis when it comes to wearing gloves to do anything. Only if a container warns "Your skin will melt off if you do not use gloves." do I actually put them on. I have washed my hands more times than I can count in the last hours of messing with this stuff.
- THIS STUFF IS STTTIICCKKYY!!!!!!!!!! Oh man, I should have known but really, underestimated the stickiness of this stuff. My blue flip flops are ruined, and I had a coating of stickiness that took forever to get off on my hands and toes.
- DROP CLOTH! Should have put one down.. or something to catch drips. My foil barrier was not enough. Good thing my husband had the intuition to stop me and get me to move this table to the garage. Not sure if I can get the stuff off of the garage floor, but I figure once it is dried, it will just be clear little spots. UPDATE: Just scraped it up.. lord that took forever and was awfully sticky and a lot of muscle power needed.
- Did I say OVERESTIMATE how much you will need? I am headed to the local hardware store to buy more.
8:57 PM
Yes I am attempting to time yet ANOTHER coat... I don't even want to total how much I have spent on resin! :) Todd made a run to Lowes to get yet another gallon of it. Now I have to configure when I will do another pour and if I will stay awake to do the last one or wake up in 5-6 hours to do it. I say go to sleep and wake up and do it.
Last coat of the day was at 9:30 PM.
Todd opened the garage door as I was smoothing it out, to put the Jeep back in.
Here's what fell from the garage door onto the goopy table!

(not the actual gecko.. I was a little too freaked out and surprised to search for the camera!)
I shall not mention the filth flarn filth that exploded out of my lips!
So I managed to scoop him up with the gift card I was using for a spreader.
He scrambled away in the closed garage, so all I can imagine is that he is probably glued to the floor somewhere, in some state of demise... gecko fossil in the garage... that'll be interesting to find.
Now we wait for it to cure. 48-72 hours.
Friday, June 28
So at some point today around noon, I decided to remove the foil and duct tape and painter's tape.
Lo and behold, the sticky drips discussed above had, of course, seeped into the duct tape and foil, so now the edges of my table look like this:
 |
I am going to finish this post, even though I REALLY wanted the last pictures to be of the table in the house. This project has taught me to expect the unexpected (as if life hasn't taught me that enough! :) and to think things through a little more than originally intended.
All in all, I am happy with the results of the table. Needs a little more work but it was a fun project!
ENDING WORDS: This table was like jumping into the deep end on the first day of swimming lessons. Maybe I SHOULD have started smaller... I don't think I 'drowned' in this leap, but it wasn't Olympic strokes! I figure once it's completely done, it has a lot of stories already built in to the creation, as well as the stories behind the bottle caps and design.


Here are the websites I used to plan the project out.
- Instructables info
- College Candy's entry (which mirrors Instructables)
- Windfarm Blog entry on their experience with bottle cap table tops
- Info on pouring and sanding resin table top
Here are some that I have used SINCE to help with understanding epoxy resin and also, how to possibly sand and buff out the edges.
- Sanding and Buffing Resin
- Epoxy Chemistry
- Epoxy Cure Times: Scroll down to the cure times. This epoxy was a 1:1 mixture.
- Sanding Resin